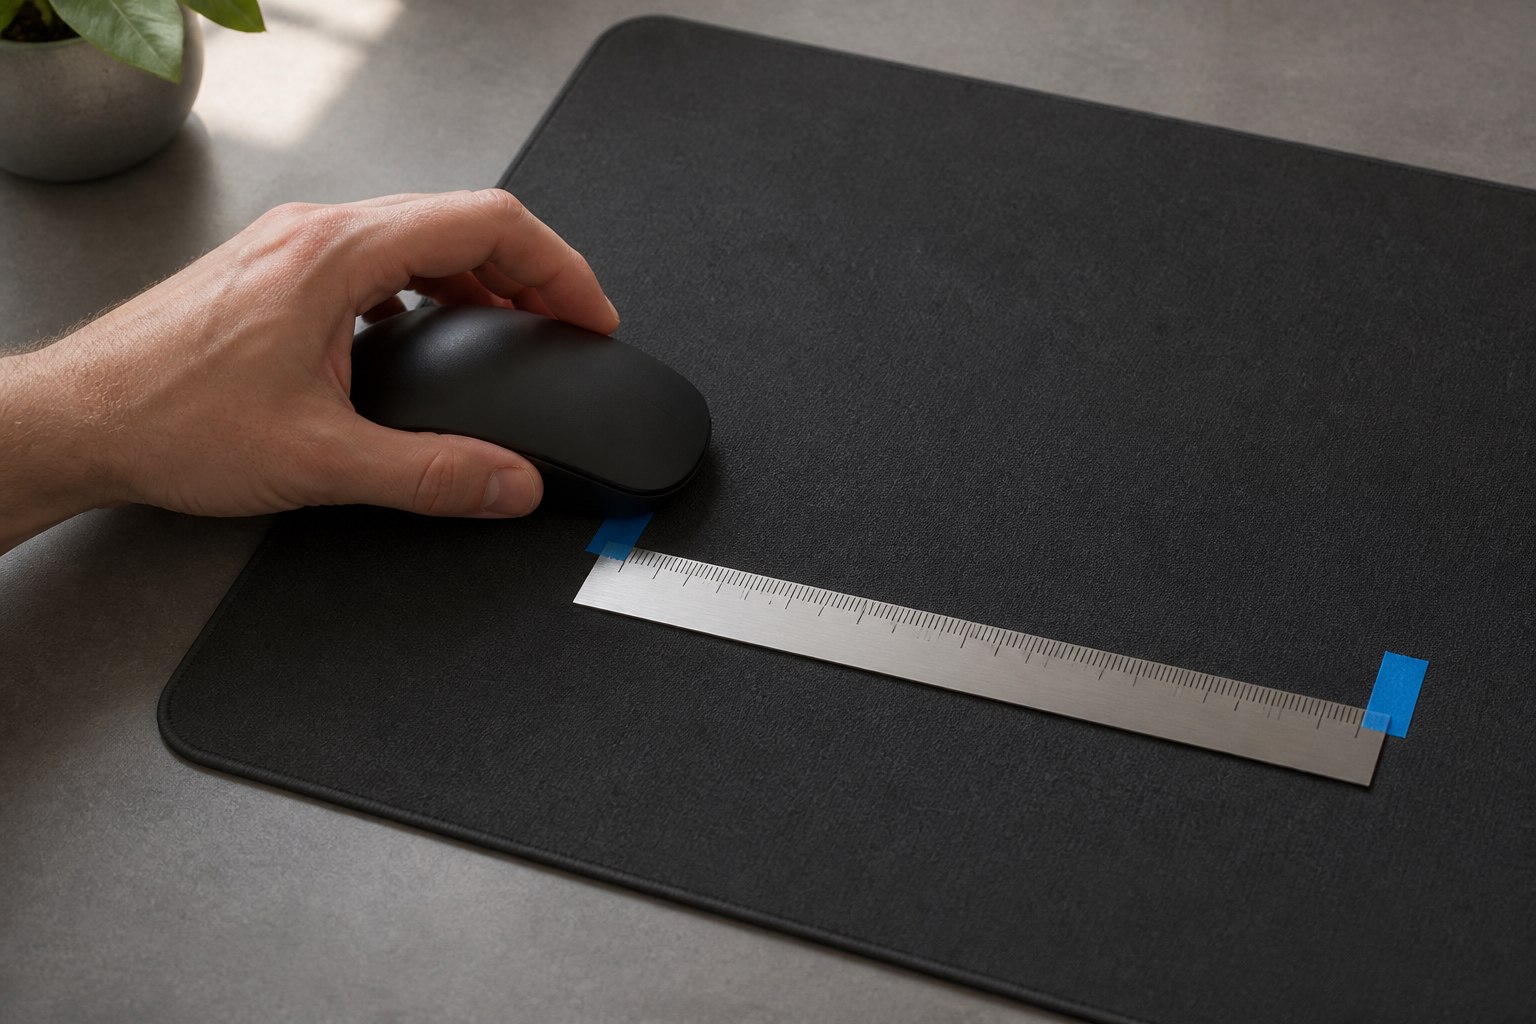
To test mouse DPI in your browser, measure a short distance on your desk, enter that distance in the Mouse DPI Test, then hold the primary mouse button (usually the left button) while moving the mouse horizontally between your marks. Release inside the track and repeat three to five clean runs. Record the readings and calculate their median yourself.
The result describes browser cursor pixels per physical inch. It does not read the mouse's saved DPI setting or certify its sensor accuracy. If you only need to find the selected DPI stage, check the software or profile supported by your exact model first. This guide helps you complete a useful beginner check and decide what to investigate next.
Decide which measurement you need
A mouse can feel faster because its configured DPI changed, because the operating system changed pointer movement, or because an application applies different sensitivity. Start with the question you actually need answered. Otherwise, you can finish a careful browser test and still use its result for the wrong job.
| Your question | Useful check | What to record |
|---|---|---|
| Which DPI stage is selected? | Supported mouse software or saved profile | Configured DPI and active profile |
| Has my desktop pointer travel changed? | Repeated browser ruler runs | Cursor px/in and unchanged test conditions |
| Does my game turn the same distance? | A repeated physical turn inside that game | Game, input mode, sensitivity and turn distance |
DPI commonly describes how many movement counts a mouse produces per inch. Polling rate describes reports per second. A report can contain movement counts, so these are separate quantities: a higher polling-rate reading does not tell you the selected DPI. Use the polling-rate test when event reporting is the question.
For gaming, keep the configured DPI separate from this browser estimate. The eDPI calculator multiplies configured DPI by in-game sensitivity. Compare that product within the same game's sensitivity scale and input mode. Substituting a desktop cursor estimate can make the arithmetic describe a different thing from the setting you intended to compare.
A browser check is useful when a familiar desktop setup suddenly feels different, or when you want a repeatable before-and-after record. It is less useful for deciding whether a sensor meets its specification. Consistent readings establish consistency in the tested setup; they do not independently establish hardware accuracy.
If your mouse has no companion software, look up the exact model's manual for its documented settings and button functions. Leave configured DPI marked unknown when you cannot verify it. You can still make a browser baseline without knowing that setting. A cursor ratio that happens to resemble a common DPI stage does not identify the factory setting or tell you which stage a button selected.
Prepare the mouse and physical distance
Keep the profile and desktop settings stable
Write down the mouse model, connection mode, selected DPI stage and profile name. Avoid pressing a DPI-stage button during the test. If the device switches profiles for individual applications, check which profile is active while the browser is in front. A game profile and a desktop profile do not have to use the same setting.
Use the manufacturer's instructions for your model. For example, Logitech documents onboard-memory mode in G HUB for supported gaming mice. That is a device-software operation; this website cannot inspect the mouse's stored profile. Do not assume instructions for one brand or model apply to every mouse.
Record operating-system pointer speed and acceleration, display scaling, browser zoom and the display used. Keep them unchanged throughout a comparison. On Windows 11, Microsoft's mouse-settings instructions place pointer speed and Enhance pointer precision under Settings > Bluetooth & devices > Mouse. Additional mouse settings provides other controls. Follow the section matching your Windows version rather than relying on a universal slider notch.
If you want to compare your normal desktop behavior, leave those settings as you normally use them. If you deliberately change a setting for a separate check, finish and label the first set of runs before changing it. Mixing runs taken under different conditions produces a summary that is difficult to interpret.
Make two physical marks
Use a flat mousepad, a readable physical ruler and two removable marks beside the mouse's path. Choose the same visible point on the mouse body for the start and finish. Keep the mouse facing the same direction. Measuring its front edge at the start and its rear edge at the finish adds the mouse's length to the movement by mistake.
The tester initializes to 1 inch after loading. That distance may push the cursor outside its bounded track, especially with a fast pointer setting. Start with an unrecorded practice movement. If necessary, choose a shorter measurable distance, such as 0.2 inch, and enter it manually. This is an example distance, not a requirement or a guarantee of sufficient screen room.
For a metric ruler, 5 mm may be easier to mark than a fraction of an inch. Select millimeters and enter 5 for those marks. The unit selector changes the label without converting the existing number. An entered 1 therefore becomes 1 mm when you switch from inches; it does not become 25.4 mm. Always enter the intended value after choosing the unit.
Keep the ruler beside the movement path rather than under the mouse feet. The on-screen scale is a drag area, not a ruler calibrated to the physical dimensions of your screen or desk. Measure the mouse's actual travel on the surface.
Complete a clean browser run
Load the tester before entering your distance. Open the DPI test and wait for the page to finish loading. Select inches or millimeters, then enter the distance between your physical marks. The plus and minus controls change that number; they do not move your marks. Check the displayed unit again before recording.
Arrange both starting positions. Put the cursor inside the track with space in your intended direction. Then align your chosen point on the physical mouse with the start mark. You can reposition or lift the mouse before recording. Once the button is held, the measured run must stay on the surface.
Hold the primary mouse button on the track. Keep it held while moving the mouse in one straight horizontal direction. Do not double-click, use the scroll wheel, or assume a tap starts a recording that continues after release. The Pixels Moved field changes as the cursor moves; it reports browser movement rather than a saved hardware setting.
Stop at your physical finish mark and release inside the track. Read the value beside DPI after releasing. A valid-looking number still needs your physical checks: did the mouse stay straight, remain on the pad and reach the intended mark? The page cannot see your ruler or verify the distance your hand travelled.
Write down the result before starting again. Note the displayed value and whether the physical movement was clean. Return to the start without recording, arrange the cursor again and repeat. Collect three to five clean runs under the same conditions. Starting another drag resets the previous display; the page does not build a saved results list for you.
If you overshoot the finish mark, do not drag backwards to repair the attempt. Release and repeat from the beginning. If you run out of track, choose a shorter physical distance and update the input to match it. Continuing after lifting and repositioning the mouse would no longer represent one measured movement.
Use a steady, comfortable pace for the first set. Avoid turning the run into a speed test. When acceleration is part of your desktop setup, different movement speeds can affect pointer travel, so deliberate slow-versus-fast comparisons need separate labelled sets. Finish the simple repeatability check before investigating that additional question.
Calculate and interpret the estimate
The calculation divides the recorded horizontal browser cursor travel by the entered physical distance in inches. Millimeters are converted to inches by dividing by 25.4. The tester rounds its final displayed estimate to a whole number. It uses the browser's viewport-relative clientX coordinate, which MDN defines as a horizontal coordinate in pixels.
| Recorded cursor travel | Entered physical distance | Calculation |
|---|---|---|
| 80 pixels | 0.2 inch | 80 ÷ 0.2 = 400 cursor px/in |
| 100 pixels | 5 mm | 100 ÷ (5 ÷ 25.4) = 508 cursor px/in |
| 200 pixels | 0.5 inch | 200 ÷ 0.5 = 400 cursor px/in |
The first and third examples produce the same ratio at different distances. That explains why the distance input must match the actual movement. If you enter 0.5 inch but move only 0.2 inch, the denominator describes a longer movement than you performed and the estimate becomes lower than it should be for that run.
Summarize the clean readings yourself
Suppose five clean runs produce 396, 400, 404, 398 and 402 cursor px/in. These are illustrative readings. Sort them as 396, 398, 400, 402 and 404. The middle value, or median, is 400. The highest-minus-lowest spread is 8 cursor px/in. Record both so you retain the summary and an indication of the variation.
Calculate that median manually; the website displays individual results. Exclude an attempt because you observed a specific mistake, such as lifting or missing a mark, rather than because its number was inconvenient. If one reading is surprising but the run appeared clean, repeat the procedure and investigate the pattern instead of silently deleting it.
A close group of results does not prove the physical distance was correct. If your two marks are too close together, you can repeat the same mistake consistently. For a beginner check, make the marks easier to identify and repeat. The DPI calibration guide covers measurement uncertainty and more controlled comparisons when that is the question you need to answer.
Keep a result labelled cursor px/in even when it resembles a common hardware DPI stage. Operating-system pointer processing and scaling can separate browser coordinates from device counts. A displayed 800 does not establish an 800-DPI sensor configuration, and an unexpected value alone is not evidence of a faulty mouse.
When a test looks wrong
The pointer leaves the track before the finish mark
Release the button and shorten the physical distance. Move your finish mark, update the input and start again with screen room in the intended direction. Do not simply enter a smaller number while keeping the old marks. If the remaining distance is too small to measure reliably with your ruler, stop treating the setup as a useful measurement and check the supported device software instead.
The value stays at zero or the run is rejected
Check that you started on the track, held your primary mouse button and moved horizontally. A vertical movement does not provide the horizontal travel used here. Read any interruption message, release the button and begin a fresh drag. Do not change distance, switch windows or open another application during a run. If the page still does not respond, reload it and re-enter your distance after loading.
The readings change from one attempt to another
Check the physical marks and mouse orientation first, then confirm that the profile and stage stayed unchanged. Keep the same surface, browser window, zoom and movement method. Compare three more clean attempts before changing a setting. Changing several controls together may change the result, but it prevents you from identifying which change mattered.
The browser result disagrees with the mouse software
Check the unit and distance entry, then review pointer speed, acceleration, display scaling and zoom. Treat the software value as the configured stage and the browser value as the observed cursor ratio. Do not force the two numbers to match by changing settings until the display looks familiar. A matching number obtained that way would not independently validate the sensor.
The desktop test repeats, but a game feels different
Check the game's active profile, sensitivity, zoom or aiming mode and input options. Repeat a physical turn inside that game with the same camera conditions. A browser desktop test cannot verify a game's raw-input path or match its sensitivity scale. For a gaming setup procedure, continue with the FPS mouse sensitivity guide.
Movement skips in several applications
Use your exact model's cleaning, connection and firmware guidance. Compare another supported surface or connection while preserving the other conditions. Record whether the behavior occurs outside this webpage too. The mouse DPI troubleshooting guide helps organize those checks; one unusual browser reading is not a hardware diagnosis.
Save a baseline you can use later
Keep one short record with the date, model, connection, configured DPI and active profile; operating-system pointer settings; display and scaling; browser and zoom; distance and unit; each clean reading; and the manually calculated median and spread. Add any rejected attempts with their observed reason. You can use a notebook or an ordinary text document.
For a later comparison, reproduce that setup before changing anything. If you intentionally test another pointer-speed setting, label a second set and change only that setting. Keep game sensitivity and physical turn measurements in separate notes. This makes a changed result a specific lead to investigate rather than a reason to replace the mouse or copy another person's settings.
For an illustrative before-and-after check, suppose the first set's median is 400 cursor px/in and a second set, after changing only desktop pointer speed, has a median of 500. The observed ratio increased by 25%: (500 − 400) ÷ 400 × 100. Record that as a change in browser pointer behavior under those conditions. It does not show that the mouse's hardware DPI increased by 25%, and it does not predict a game's response.
Once you can repeat a clean run, the beginner task is complete: you have a record of browser pointer behavior under known conditions. Read our measurement methods and limits before using another tool's result for a different question.